> For the complete documentation index, see [llms.txt](https://docs.testfiesta.com/llms.txt). Markdown versions of documentation pages are available by appending `.md` to page URLs; this page is available as [Markdown](https://docs.testfiesta.com/automation/ci-cd-integration/jenkins-freestyle.md).
# Jenkins (Freestyle)
Jenkins is the leading open source automation server, Jenkins provides hundreds of plugins to support building, deploying and automating any project.
You can use our [jenkins](https://plugins.jenkins.io/tacotruck-plugin) plugin in your free-style project. You can setup jenkins from their official [docs](https://www.jenkins.io/doc/book/installing/) or follow our [Jenkins (Pipeline)](/automation/ci-cd-integration/jenkins-pipeline.md) guide.
### Install Tacotruck plugin
Go to the "Available Plugins" section on the settings page and search for "Tacotruck" to install.
### Install Node.js Plugin
Tacotruck plugin requires `nodejs` as dependency. Login to your jenkins dasboard and go to the settings page. Plugins are available at this path. You can search for "Nodejs" plugin. Select the plugin and install. You may need to restart your jenkins instance after installing the nodejs plugin.
### Configure Nodejs as Global Tool
1. Go to settings and click on tools section.
2. Click on "Add Nodejs" button
3. Install a Nodejs version. Please make sure that you install node **version** ≥ `20`. You need to name the Tool so that we can refer it later from the pipeline script.
### Create a Freestyle project
Click on the "New Item" button from the home page of jenkins dashboard and create a new freestyle project.
### Configure your project
First we need to configure `nodejs` environment for Tacotruck CLI. We can select the "Environment" tab and under "Envronment" section we should select the option to `Provide Node & npm bin/ folder to PATH`
### Add Build and Test step
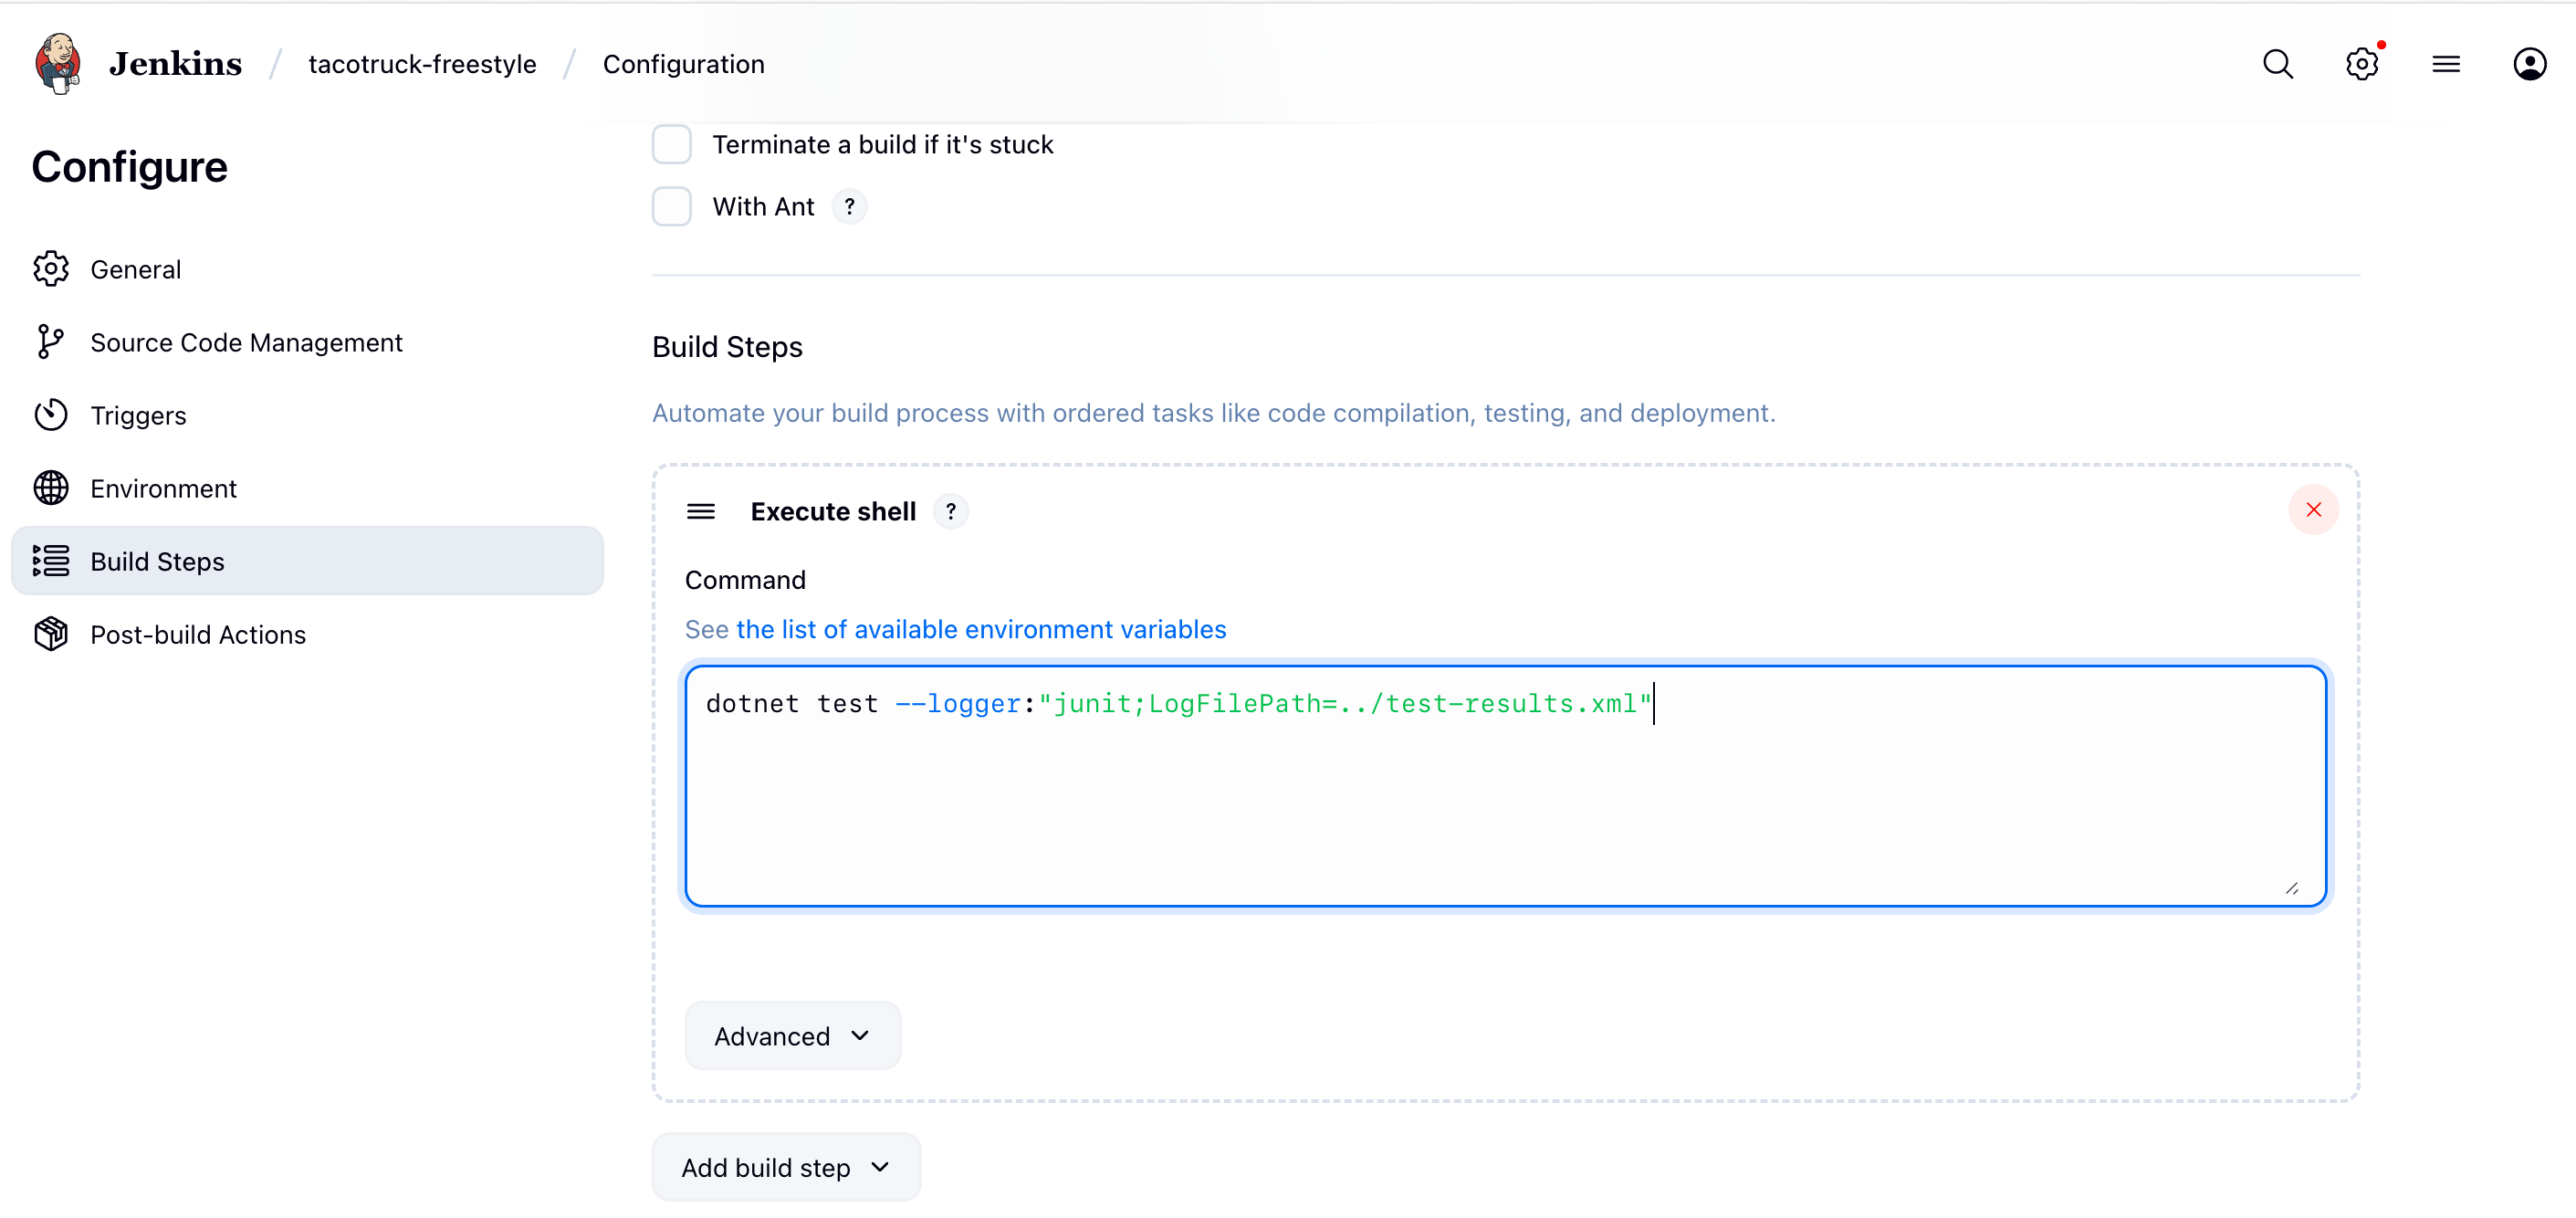
You can configure build and test step based on your tech stack or requirements. Here is an example that runs a C# .NET test and outputs a `test-results.xml` file.
### Submit the test results using Tacotruck step
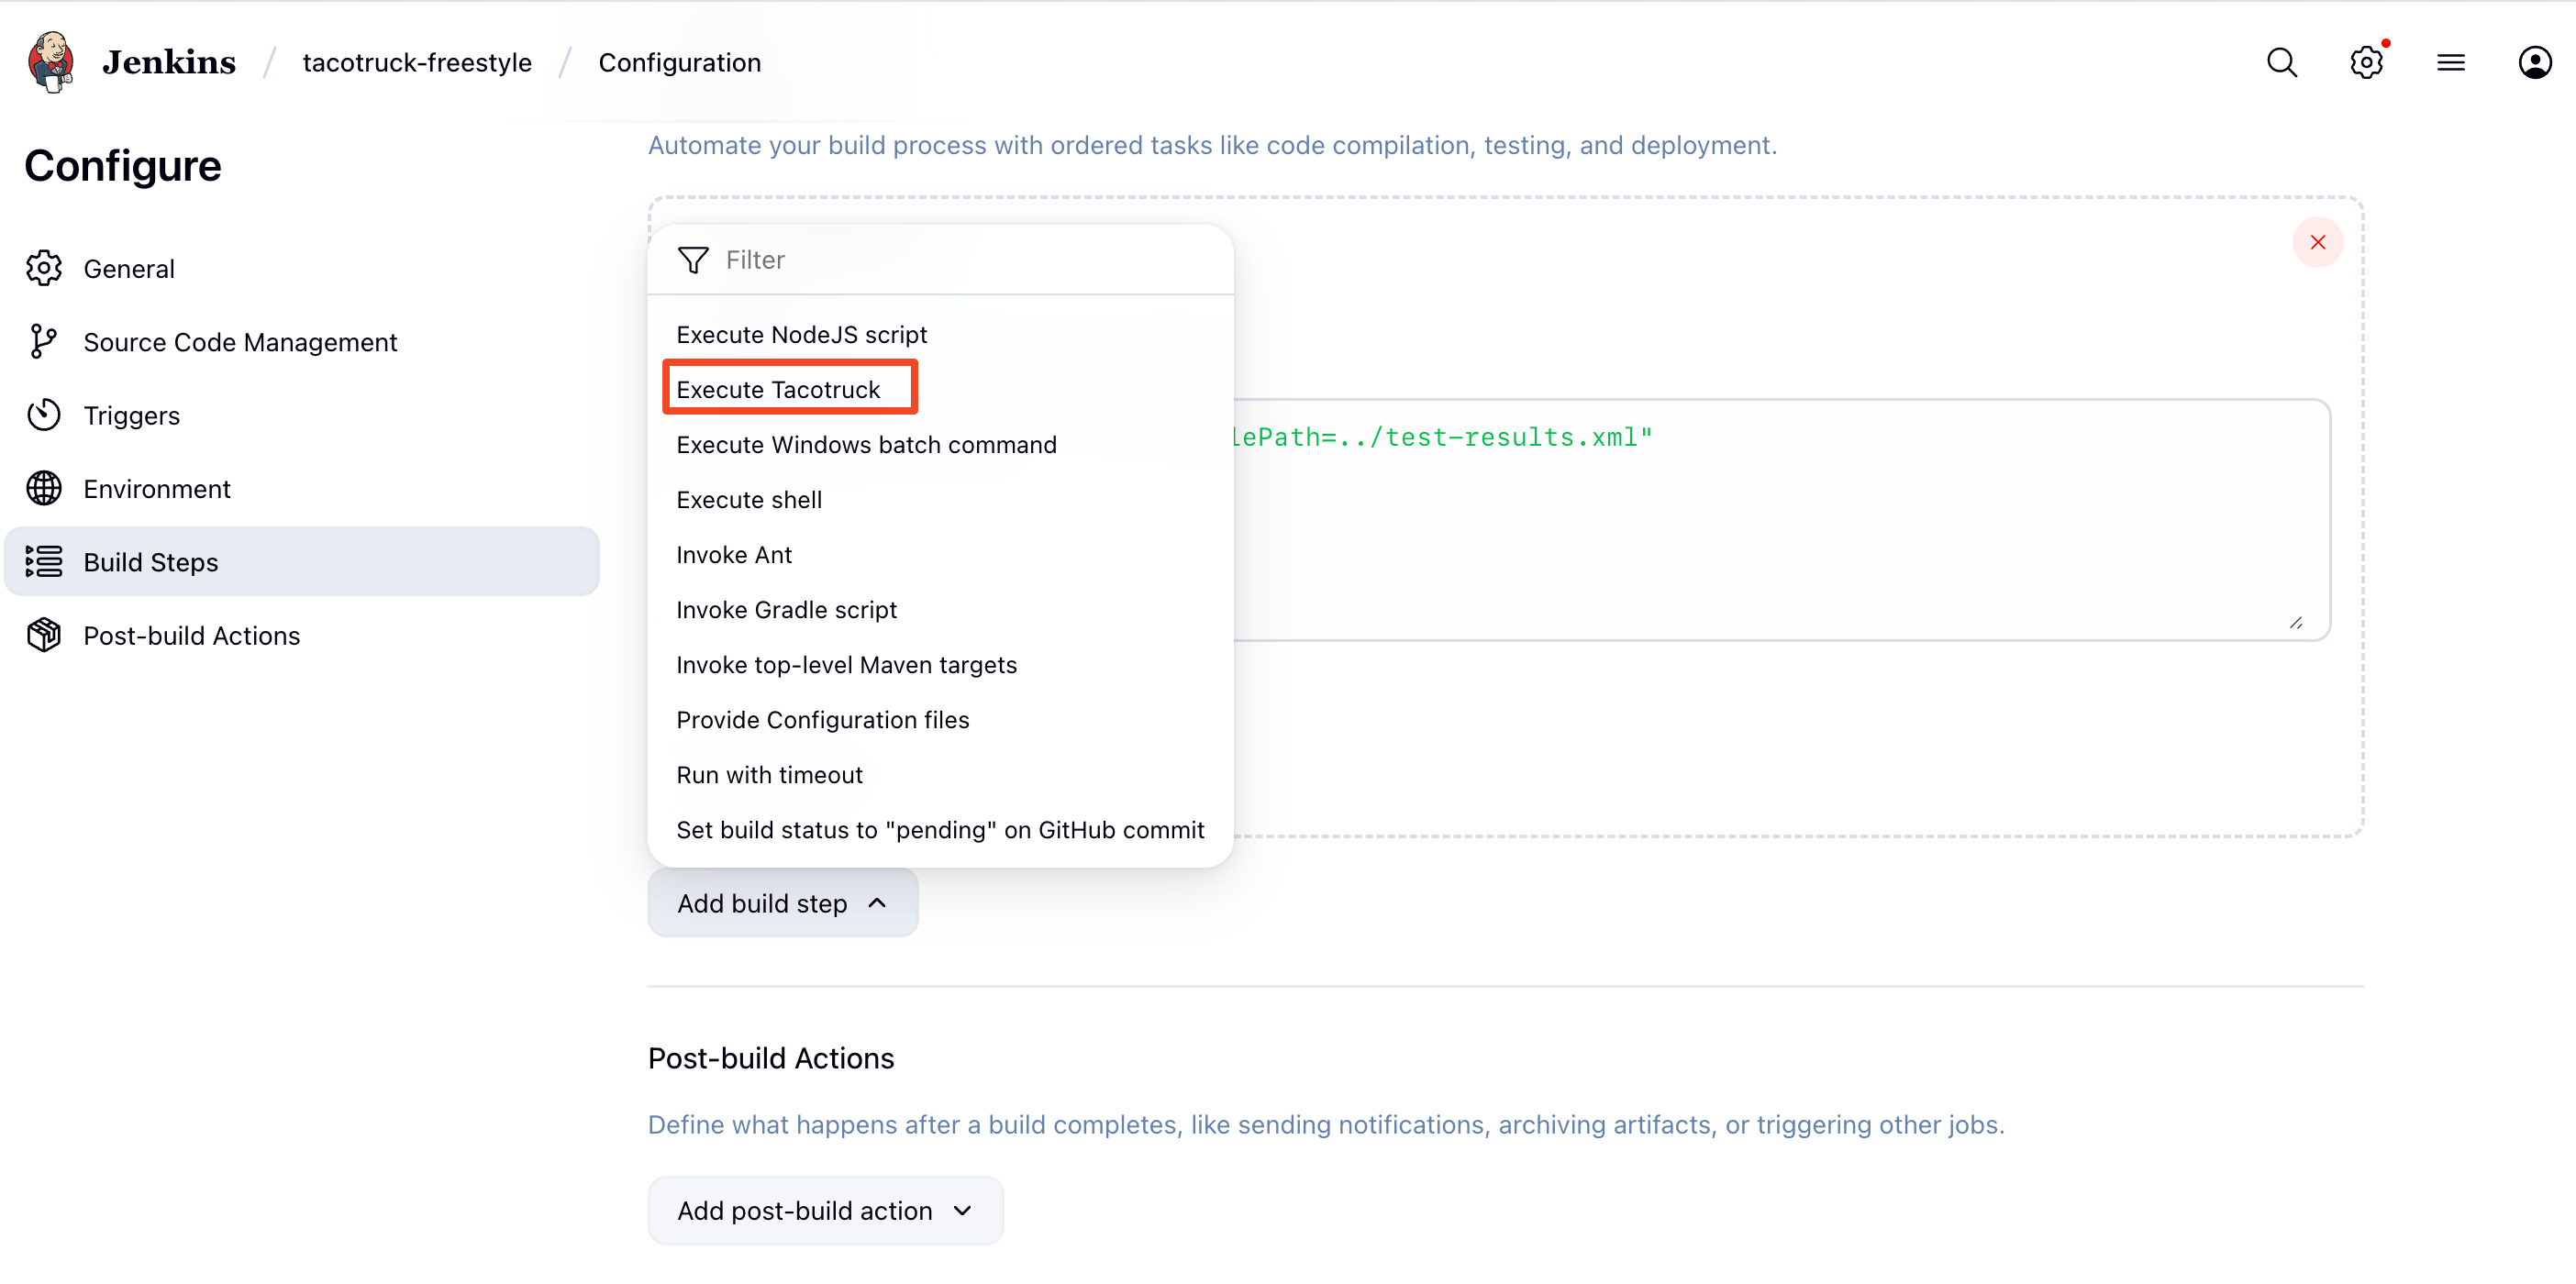
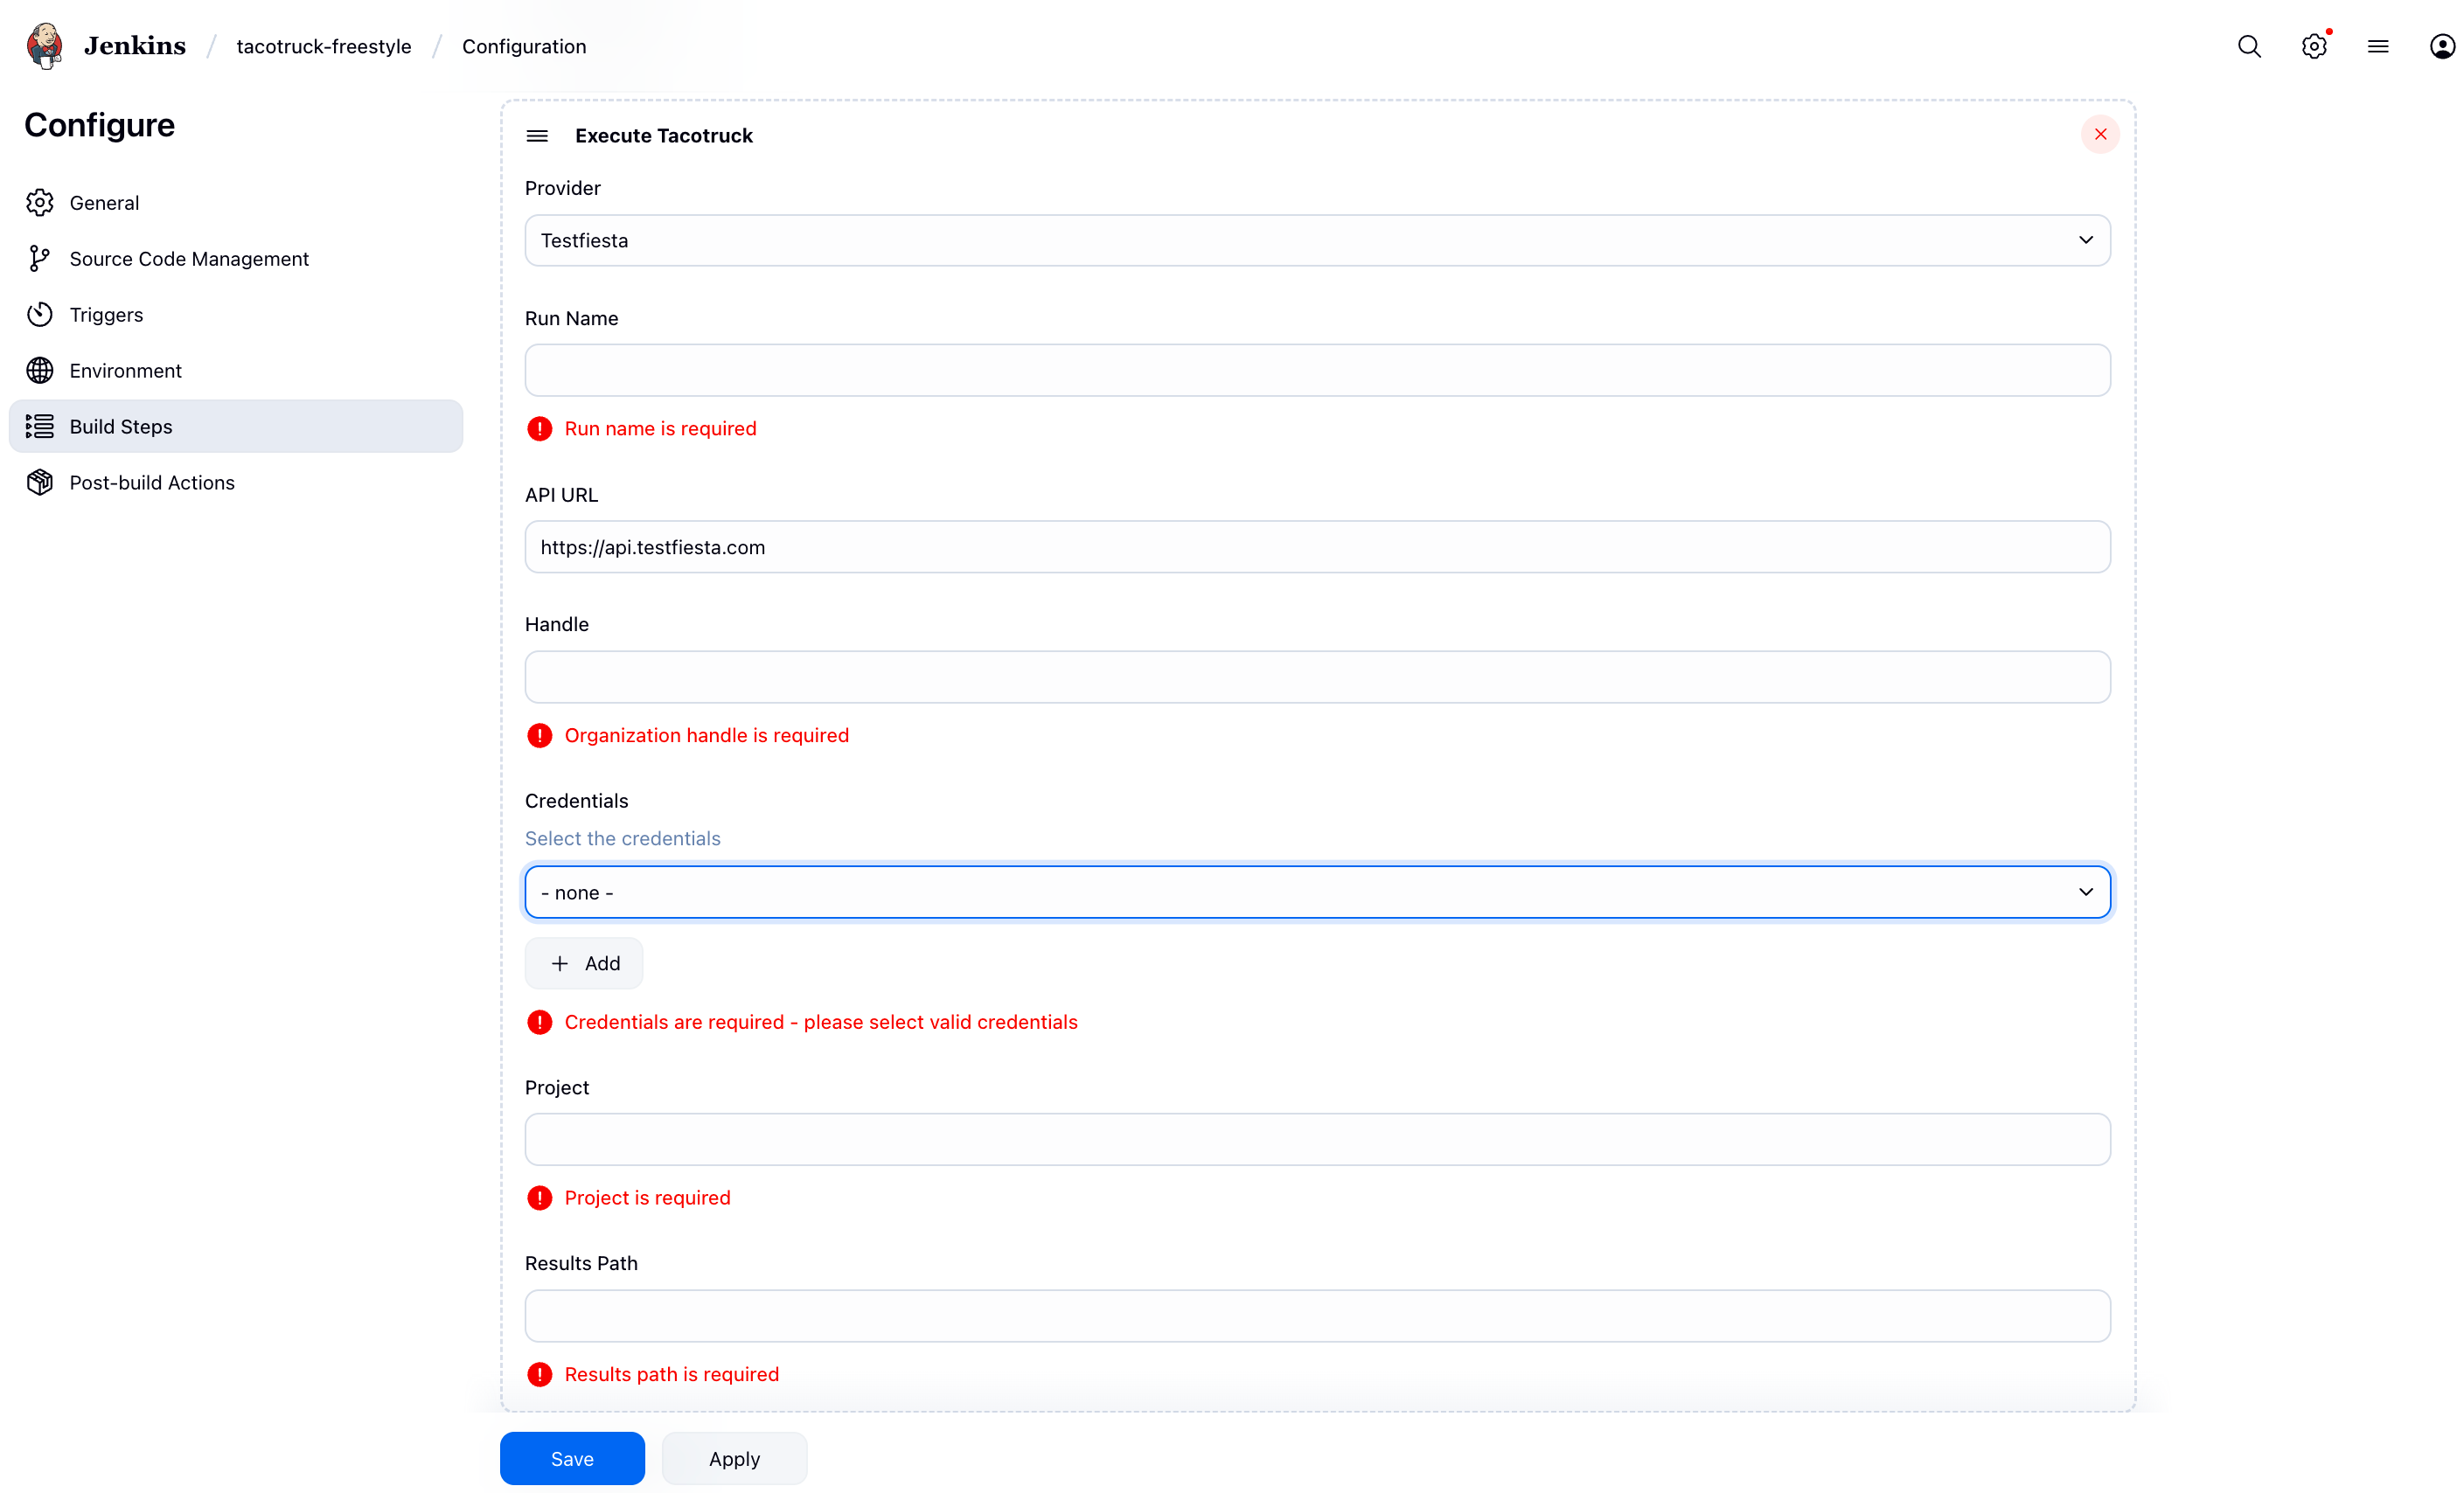
We can add "Execute Tacotruck" build step from "Add build step" dropdown button and configure all the required fields.
### Support and Resources
* [TacoTruck Examples](https://github.com/testfiesta/tacotruck-examples)
* [Jenkins Plugin](https://plugins.jenkins.io/tacotruck)
* [Jenkins Plugin Source](https://github.com/jenkinsci/tacotruck-plugin)
* [Tacotruck Issues](https://github.com/testfiesta/tacotruck/issues)
* [**CLI Reference**](/automation/tacotruck-cli.md)